Australian Biscuits News & Recipes

Where to buy the best Australian biscuits, product information, reviews, recipes, news and retailer information. Read our Blog for the latest on Aussie cookies and bickies Read More.
The Best Biscuits For Yogurt Cheesecake
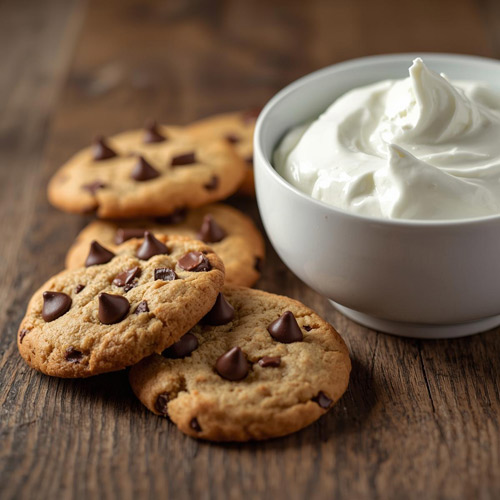
The viral yogurt cheesecake recipe works because of physics. Greek yogurt is thick and tangy. Hard biscuits are dry and sweet. When you introduce one to the other over several hours in a sealed container, moisture transfers, textures shift, and somehow you end up with something that genuinely tastes like cheesecake without any of the actual cheesecake.
But which biscuit you choose for yogurt cheesecake matters far more than most people realise. Not all biscuits absorb moisture the same way. Not all of them distribute flavour evenly through yogurt. And crucially, not all of them are made with the kind of genuine ingredients that actually improve when they soften into creamy yogurt.
Here’s where Bush Cookies from Opera Foods enter the conversation.
What Are the Best Biscuits for Yogurt Cheesecake?
Vanilla Melting Moments
Most yogurt cheesecake recipes rely on Biscoff or digestive biscuits. Functional. Fine. But our Vanilla Melting Moments bring something different: a cream filling sandwiched between two shortbread halves.
As the biscuits soften in yogurt, both the shortbread and the cream filling absorb moisture, but in different ways. The shortbread dissolves gradually into the yogurt, whilst the cream filling softens into a custard-like texture that stays largely intact. After six hours, you get these pockets of vanilla cream throughout—soft, sweet, almost pudding-like—contrasting against the dissolved shortbread that’s merged with the yogurt.
It’s textural complexity that plain biscuits can’t deliver. You’re not just eating yogurt that tastes like biscuit. You’re eating yogurt with actual cream pockets distributed throughout.
Anzac Biscuits
Anzac biscuits feel out of place for this 2-ingredient yoghurt cheesecake. They’re rustic. Golden syrup and coconut. Historically Australian. Nothing about them screams “viral Japanese dessert.” Yet they deliver something that sweeter, softer biscuits don’t.
The coconut brings texture that actually survives the yogurt absorption process. Unlike some biscuits that can soften into near-dissolution, our Anzac biscuits maintain subtle structural integrity even after twelve hours. The golden syrup creates a caramelised depth that complements yogurt’s tartness rather than fighting it. The oats add an earthiness that feels almost wholesome in comparison to other options.
When Anzac biscuits soften into Greek yogurt, they still taste like themselves.
Passionfruit Creams
Passionfruit cream biscuits introduce a distinct tropical fruit flavour into yogurt. The buttery, crumbly shortbread holds the passionfruit flavouring—real fruit taste, not artificial—and as it softens into the yogurt, that flavour gradually disperses throughout.
You get soft fragments of buttery shortbread distributed through the yogurt, carrying passionfruit notes with them. The cream filling, meanwhile, softens into its own pockets, providing sweetness and richness that balances the fruit flavour.
Coffee Creams
Coffee creams create something surprising: a yogurt cheesecake that tastes like tiramisu. The combination of coffee biscuit and Greek yogurt’s natural tang produces that same sophisticated, slightly bitter-sweet character without any of the complexity of the original dessert.
As the biscuits soften, the coffee flavour bleeds gradually into the yogurt. The cream filling holds its own pockets of sweetness. What emerges is a dessert that sits between breakfast and dessert—creamy and substantial like cheesecake, but with the clean, bright edge that coffee brings. The tartness of the yogurt becomes a feature rather than something to balance. It cuts through the richness in exactly the way the coffee biscuit intended.
This only works if the coffee flavour is genuine. The right biscuit makes the dessert sing.
Chocolate Chip Cookies
This is the one everyone reaches for. Handmade chocolate chip cookies generously filled with actual chocolate. When they soften into yogurt, they bring what people actually want: chocolate flavour distributed throughout the dessert.
The chocolate doesn’t disappear. It’s there in every spoonful. As the cookie dissolves, the chocolate pieces release their flavour into the yogurt, creating something that tastes fundamentally like chocolate cheesecake without requiring any eggs, cream cheese, or oven time. It’s straightforward. It works. There’s no complexity to explain away, just creamy yogurt with chocolate cookie and genuine chocolate throughout.
People love chocolate. Chocolate chip cookies more than deliver.
Why Use Handmade Biscuits?
Handmade Bush Cookies use real ingredients. The texture is what happens when you work with real materials: buttery, crumbly, with actual character.
When these biscuits soften into yogurt, what you taste is straightforward. Real ingredients softening into real yogurt.
The viral trend works because yogurt cheesecake is genuinely simple. Two ingredients. Patience. When you’re working with only two things, both of them matter. The better the biscuit, the better the outcome.
How Do You Make Yogurt Cheesecake?
Insert four to five biscuits vertically into 200–250ml of full-fat Greek yogurt. Seal. Refrigerate for four to twenty-four hours. Longer refrigeration creates softer integration. Shorter refrigeration preserves more biscuit texture. Both are fine. The biscuit choice determines the outcome far more than the timing.
That’s genuinely it. The method isn’t the story. The biscuit is.
Yogurt Cheesecake FAQs
Q: How long does yogurt cheesecake last in the fridge?
A: Yogurt cheesecake lasts 3-4 days in a sealed container. The biscuits remain soft and the yogurt stays fresh throughout this window.
Q: Can you use any type of yogurt for yogurt cheesecake?
A: Full-fat Greek yogurt works best. It creates the richest, most creamy texture that most closely resembles traditional cheesecake. Low-fat or zero-fat versions create a thinner, less satisfying consistency.
Q: Do the biscuits get soggy in yogurt cheesecake?
A: They soften rather than go soggy. The biscuits absorb moisture and gradually integrate into the yogurt whilst maintaining some structural character depending on which biscuit type you choose.
Q: Can you make yogurt cheesecake ahead of time?
A: Yes—in fact, it requires 4-24 hours of refrigeration, making it ideal for advance preparation. You can assemble it in the morning and it will be ready to eat by evening or the next day.
Q: What biscuits work best for yogurt cheesecake?
A: Cream-filled biscuits like Vanilla Melting Moments, sturdy options like Anzac biscuits, and chocolate chip cookies all work beautifully. Each brings different texture and flavour characteristics to the final dessert.
Q: Why does biscuit quality matter in yogurt cheesecake?
A: Because there are only two ingredients, the quality of each one becomes critical. Handmade biscuits with real ingredients transform as they soften into yogurt in ways that deliver genuine flavour and texture.
Explore our full range of Australian Biscuits and Cookies today.
This article was reproduced on this site with permission from operafoods.com.au the “Handmade Australian Biscuit Suppliers”.
See original article:- The Best Biscuits For Yogurt Cheesecake
How to Make Perfect Icing for Cookies: A Step-by-Step Guide
Cookies and biscuits are already awesome on their own, but with a bit of know-how, you can quickly (and easily) elevate them into something special. The right icing not only elevates the look of your cookies but also adds an extra layer of flavour and fun. Whether you’re preparing for a holiday season, a birthday party, or just a treat-yourself moment, this guide will walk you through everything you need to know to create perfect icing for cookies.
Types of Icing for Cookies
Before we jump into the details, let’s explore three popular types of cookie icing. Each one has its unique personality, so you’ll want to pick the best fit for your cookie project.
Royal Icing
What is it?
This smooth, hard-drying icing is perfect for detailed decorations. Think intricate snowflakes or lettering—it’s a true artist’s ally.
When to Use It
It’s ideal for sugar cookies that you want to decorate with precision and flair.
Glace Icing
What is it?
Glace icing is shiny, easy to spread, and dries with a softer finish than royal icing.
When to Use It
Perfect for creating simple designs, flooding large areas, or dipping cookies for a sleek look.
Buttercream Icing
What is it?
Creamy, rich, and incredibly flavorful, buttercream icing is more about taste than precision.
When to Use It
Best for cookies that don’t require intricate designs but need a pop of softly textured flavour and a pretty colour.
Ingredients You’ll Need
Each type of icing calls for slightly different ingredients. Here’s a quick shopping list to get you started
Royal Icing
- Powdered sugar
- Egg whites
- Water
- Optional: Vanilla extract or other flavourings
Glaze Icing
- Powdered sugar
- Milk or water
- Corn syrup (for that lovely shine)
- Optional: Flavour extracts
Buttercream Icing
- Unsalted butter (softened)
- Powdered sugar
- Milk or cream
- Vanilla extract
Got all that? Perfect. Now, onto the tools.
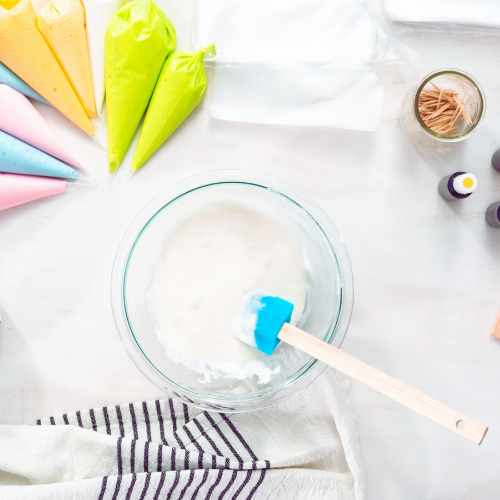
Tools You’ll Need
Creating beautiful, decorated cookies is much easier when you have the right tools. Here’s what you’ll need for success.
- Mixing bowls (at least two, but more is always handy!)
- Electric mixer (especially crucial for royal icing and buttercream)
- Piping bags and assorted tips
- Toothpicks (for fine details)
- Squeeze bottles for flooding cookies
- Spatula or spoon for mixing
If you don’t have piping bags, don’t sweat it—zip-top bags work in a pinch!
Recipes for Icing
A simple glace icing may seem foolproof, but buttercream is by far the most forgiving. So let’s start there.
Buttercream Icing Recipe
Here’s a simple and delicious recipe for classic buttercream icing that’s perfect for decorating cookies, as well as cakes, or cupcakes!
Ingredients:
- 1 cup (2 sticks) unsalted butter, softened
- 4 cups powdered sugar, sifted
- 2-3 tablespoons heavy cream or milk
- 1 teaspoon vanilla extract (or any flavouring you prefer)
- A pinch of salt
Instructions:
- Beat the butter – Using an electric mixer, beat the softened butter on medium speed until it’s creamy and smooth (about 2-3 minutes).
- Gradually add powdered sugar – Lower the mixer speed and slowly add the powdered sugar, one cup at a time, mixing well after each addition. Make sure to scrape down the sides of the bowl as needed.
- Add flavour and cream – Mix in the vanilla extract and a pinch of salt. Then, slowly add the heavy cream or milk, one tablespoon at a time, until you achieve your desired consistency—smooth and spreadable or slightly stiffer for piping.
- Whip it up – Once all ingredients are combined, increase the mixer speed to high and beat for an additional 2-3 minutes to give the buttercream a fluffy texture.
Your buttercream is now ready to use! Feel free to add food colouring for vibrant designs or additional extracts to customise the flavour to your liking.
If you’re not using it right away, store it in an airtight container and refrigerate. Just remember to bring it back to room temperature and re-whip before using!
Glace Icing Recipe
Glace icing is a simple and versatile topping that’s perfect for decorating cookies, cakes, or pastries. Here’s an easy recipe to make your own:
Ingredients
- 2 cups (250g) powdered sugar, sifted
- 3-4 tablespoons water or milk
- Optional: a few drops of food colouring or flavoured extract
Instructions
- Combine the ingredients – Place the sifted powdered sugar into a bowl. Add the water or milk a tablespoon at a time and mix until smooth. If the icing is too thick, add a little more liquid, a teaspoon at a time, until your desired consistency is reached. Too thin, and it is very difficult to bring back without lumps.
- Customise – To make your icing more colourful or flavorful, add a few drops of food colouring or extract, like vanilla or almond, and mix thoroughly.
- Use immediately – Spread or drizzle the glace icing over your baked goods using the back of a spoon or a piping bag for more precise designs. It will harden as it sets, so try to work quickly.
Glace icing dries to a smooth, shiny finish, making it ideal for decorating cookies and biscuits. It can be used for cakes, but tends to soak in, so you need to add a few layers.
Recipe for Traditional Royal Icing (Using Egg Whites)
Royal icing is a versatile icing that’s famously used for decorating cookies, assembling gingerbread houses, and adding intricate designs to cakes. Here’s a detailed recipe to make the perfect batch.
Ingredients
- 3 large egg whites
- 4 cups (1 lb) of powdered sugar, sifted
- 1 teaspoon fresh lemon juice
Instructions
- Prepare the egg whites – Carefully separate the egg whites from the yolks, ensuring no yolk gets into the whites. Place the egg whites in a clean, grease-free mixing bowl.
- Whisk the egg whites – Using a hand or stand mixer fitted with a whisk attachment, start whisking the egg whites on medium speed until they turn frothy.
- Add powdered sugar gradually – Reduce the speed to low and gradually add the sifted powdered sugar, one spoonful at a time. This ensures the sugar fully incorporates and the consistency stays smooth.
- Increase speed and whip – Once all the sugar is added, increase the mixer speed to medium-high and continue to beat the mixture until stiff, glossy peaks form. This usually takes about 5-7 minutes.
- Adjust to taste – Mix in the lemon juice. It is there to balance out sweetness and keep your white icing bright. If the icing feels too thick for your use, you can thin it out with a few drops of water; add slowly and mix well.
Flavour and Colour
Royal icing is not usually flavoured (although it can be), but you may want to add colouring. Just be aware that any liquid colour or flavour will water down the consistency. Gel colours are excellent for this purpose.
Tips for Best Use
- Consistency matters – For piping fine details, the icing should hold stiff peaks, but for flooding cookies, it should be slightly thinned to establish a smooth, flowy texture.
- Cover while working – Royal icing dries quickly when exposed to air, so keep the icing covered with a damp paper towel and plastic wrap while you’re working.
- Storage – Store any unused icing in an airtight container in the refrigerator for up to 3 days. Give it a quick mix before use as it may settle.
With its smooth texture and ability to harden to a durable finish, royal icing is perfect for both experienced decorators and beginners looking to add a professional touch to their baked creations.
Tips for Decorating Cookies
Once your icing is ready, it’s time for the fun part—decorating! Here are some handy tips to help you channel your inner cookie artist:
Consistency is Key
Royal icing should be thicker for piping and line work but slightly thinner for flooding. If it runs off the side of the cookie, it’s too thin.
Colour Carefully
Add food colouring sparingly to avoid altering the icing’s consistency. Gel colours are a great choice!
Layering Made Easy
Allow each layer of icing to dry before adding another. Patience pays off with crisp designs.
Store Smart
Leftover royal or glaze icing can be stored in an airtight container and used later. Buttercream, however, is best when fresh.
Common Mistakes to Avoid
Even seasoned bakers slip up sometimes, but these tips will keep your icing game strong.
Lumps Are Your Enemy
Always sift powdered sugar—it’s a step worth taking.
Don’t Overmix or Undermix Royal Icing
Overmixing can make it too stiff, while undermixing leaves it weak and runny. Aim for those perfect peaks!
Skipping Drying Time
Layers of icing need time to dry. Rushing leads to smudging and heartbreak (seriously).
Get Creative!
Icing cookies is all about having fun and letting your creativity shine. With your new skills, there’s no limit to what you can create—whether it’s a batch of vibrant, rainbow-hued treats or a classic white-and-gold design for wedding favours. Don’t be afraid to experiment, try new techniques, or even make mistakes (they’re part of the learning process).
Of course, you can always take a shortcut if you don’t have time to bake your cookies. Elevate our handmade Australian biscuits and cookies instead with your newly acquired icing skills.
This article was reproduced on this site with permission from operafoods.com.au the “Packaged Cookies Suppliers”.
See original article:- How to Make Perfect Icing for Cookies: A Step-by-Step Guide
Why Everyone Loves Morning Tea

Morning tea holds a special place in our daily lives. Whether it’s an office ritual, a family gathering, or simply a quiet moment to yourself, morning tea has become more than just a beverage break. It’s a cherished tradition that brings comfort, joy, and connection to people around the globe.
But what makes morning tea so universally loved? Grab a cuppa as we explore our nation’s favourite tradition.
How Morning Tea Became a Global Favourite
Morning tea may trace its roots to English tea culture, where a midday tea break was cherished as a staple of daily life. However, other cultures have also embraced similar traditions that blend relaxation with refreshment. From Japan’s matcha tea ceremonies to India’s chai stalls bustling with life, morning tea is a cherished ritual with deep historical significance.
In Australia, morning tea or ‘smoko’ as it is still widely known, has evolved into a firm workplace tradition. Whether it’s a quick coffee run or a leisurely chat over tea and bikkies, morning tea is an integral part of our culture.
The Social Aspect of Morning Tea
Bringing People Together
Morning tea is more than just a drink; it’s a social glue that brings people together. Picture it: a quiet chat over tea at home, the hustle of coworkers huddled around the kettle in the office kitchenette, or a casual conversation at a café. These moments become the perfect backdrop to build connections, foster relationships, and create memories.
For many workplaces, the “tea break” is almost sacred. It’s an opportunity to step away from tasks, share laughs with colleagues, and return to work refreshed and bonded.
Fostering Conversations and Community
The ritual of brewing and sharing tea encourages thoughtfulness and connection. Morning tea fosters a sense of belonging that transcends age, culture, and background. It serves as a moment to celebrate community, whether it’s with family, friends, or new acquaintances.
Morning Tea For Charitable Causes
Morning tea gatherings for charity have been a thing for many years now. People come together, enjoy their cup of tea and some delicious treats, all while raising money for a good cause.
One of the most iconic charity morning teas in Australia is The Biggest Morning Tea, organised by the Cancer Council. This annual event brings communities together to enjoy tea and treats while raising vital funds for cancer research, prevention, and support services. Participants host or attend gatherings in homes, workplaces, or community spaces, making it a nationwide tradition of giving.
Another popular initiative is the Australia’s Biggest Morning Tea for Lifeline, where funds go toward supporting mental health and crisis support programs. These events emphasize community wellbeing and start meaningful conversations in a warm and welcoming environment.
Additionally, local community groups and schools often host morning teas to support smaller, grassroots charities, promoting diverse causes such as education, homelessness, or environmental projects. These gatherings continue to highlight the unifying power of sharing a cup of tea and a few biscuits for a greater purpose.
Taking Time For Self-Care
In today’s fast-paced world, it can be easy to neglect self-care. But morning tea offers the perfect opportunity to slow down and take care of yourself.
Popular Tea Varieties and What They Offer
Morning tea isn’t just comforting; it comes with wellness benefits too. Depending on your brew of choice, you can gain a myriad of health advantages, such as these fan-favourite teas.
Green Tea is rich in antioxidants that promote heart health and boost metabolism.
Chamomile Tea calms the mind, making it perfect for a mid-morning breather.
Oolong is the go-to tea for improved digestion and mental clarity.
Black Tea, packed with flavonoids, supports immune health.
Taking a Well-Deserved Pause Boosts Mental Clarity
Stepping away for a tea break has surprising benefits for your mental health, too. It can improve focus, lower stress levels, and infuse your mind with fresh ideas. Taking these intentional pauses helps pace your day while keeping burnout at bay.
Tea and Biscuits Perfect Pairings
Every good tea deserves an equally exceptional biscuit to go with it. Or should that be the other way around?
Black Tea
Black tea remains the king of the morning cuppas, and who doesn’t love a builders brew with a classic (dare we say dunkable) biscuit?
These macadamia biscuits are great with a good, strong brew.
Green Tea
Just because you enjoy something a little lighter, doesn’t mean there isn’t a biscuit for you.
Maybe a simple butter shortbread will hit the spot?
Chai
The comforting milky scent of spiced chai tea is a popular choice that needs a robust biscuit.
These ginger and date biscuits are sweet, crunchy and spicy.
Modern Twists on Morning Tea
On-the-Go Lifestyles and New Rituals
As lifestyles evolve, so does the tradition of morning tea. Today, busy mornings often call for innovative tea blends or ready-to-go options. Many coffee shops now offer a range of premium teas designed for people who want the morning tea experience without sacrificing convenience.
Reusable tea flasks, DIY cold brews, and digital tea timers are also making their way into modern tea culture. Busy tea lovers, rejoice!
Tea Gets a Makeover
Creative, modern twists on tea are revitalising the ritual. Think floral-infused blends, caffeine-free herbal teas, or funky flavours like caramel matcha. These innovations are proof that morning tea is an adaptable tradition, one that embraces change while staying grounded in its roots.
Morning Tea Is a Moment of Mindfulness
Amidst the whirlwind of our daily lives, morning tea is more meaningful than it seems. It’s a pause, a chance to reset and connect with ourselves. That quiet moment alone or shared with others can become a daily act of mindfulness.
Morning tea reminds us to slow down, breathe, and savour the small but meaningful joys of the day.
Make Morning Tea the Highlight of Your Day
Morning tea isn’t just a tradition; it’s a celebration of connection, relaxation, and indulgence. Shared with friends, or enjoyed in solitude, it’s a ritual worth preserving and celebrating.
Check out our range of delicious handcrafted Australian biscuits, made for you to make every tea break memorable.
Take a moment today. Brew your tea, grab a biscuit, and reclaim your peace.
This article was reproduced on this site with permission from operafoods.com.au the “Australian Biscuit Suppliers”.
See original article:- Why Everyone Loves Morning Tea
The Allure of Melting Moments: What Makes Them So Irresistible?
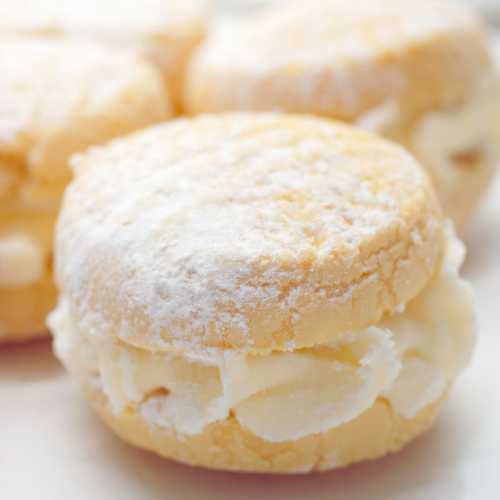
There’s something undeniably pleasing about melting moments, those buttery, crumbly biscuits that seem to dissolve on your tongue. For biscuit lovers, they’re more than just a treat; they’re an experience, a little piece of joy. Beloved across continents and perfect for every occasion, it’s easy to see why melting moments hold such a special place in our hearts (and on our plates).
But what exactly makes these biscuits so irresistible? Is it their unique texture, their simplicity, or the nostalgia they evoke with every bite? Today, we’re diving into the world of melting moments to uncover the secrets behind their universal appeal and why they remain a timeless favourite.
What Are Melting Moments?
Melting moments are delicate sandwich biscuits, often joined by a gently sweet filling or cream. Their defining characteristic is right there in the name. Bite into one, and they literally melt in your mouth, leaving behind a subtle buttery sweetness.
These biscuits are often made using just a handful of ingredients, yet they deliver a flavour and texture that’s nothing short of magical. There’s genius in their simplicity, which perhaps is part of their enduring charm.
What Defines a Melting Moment?
When is a melting moment a melting moment, you might ask? And not a yoyo, or (gasp) a shortbread biscuit.
The Secret Behind the Texture
If you are familiar with the classic melting moment, you know they’re unlike any other biscuit. They’re soft yet crumbly, tender yet structured. This signature texture is the result of two key ingredients working their magic together: butter and cornstarch. The butter gives them their rich, creamy flavour, while cornstarch makes them impossibly light and crumbly. Without these two, melting moments simply wouldn’t be the same.
Wait, what about custard powder?
There is much debate about cornstarch vs custard powder, and the difference between a yoyo and a melting moment. The problem is that the answer has fallen prey to the Chinese whispers effect.
The oracle that is the internet now swears blind that a melting moment is made with cornstarch, and a yoyo is made with custard powder. Have at it, we say. Custard powder is pretty much just fancy cornstarch, and the two are completely interchangeable.
Lightly Sweet, Always Perfect
Another hallmark of these biscuits is their subtle, restrained sweetness. Instead of being overpowering, the sweetness enhances the buttery flavour, letting you enjoy every nuance of the treat. This gives melting moments their versatility, making them perfect for pairing with a morning coffee or elevating a high tea.
The Role of Butter and Cornstarch
Recipes abound, and many have been passed down through the generations. Whilst proper butter and cornflour may be de rigueur today, the war generations may have sworn by margarine and custard powder. So we repeat; have at it. What’s important is the alchemy between fat and cornstarch that creates the melting texture.
The fat provides richness and moisture, while the cornstarch (without the heavy burden of gluten) lends a lightness that makes each bite crumble effortlessly. Together they create a tender, melt-in-your-mouth texture, with a careful balance that ensures the biscuits retain their shape while being delightfully fragile to the touch.
A Nostalgic Delight
Can you recall the first time you had a melting moment? Perhaps it was baked at home with a loved one, or maybe it was served at a family gathering. For many, these biscuits carry a sense of nostalgia. They remind us of warm kitchens, shared conversations, and little moments of indulgence.
There’s an undeniable emotional connection to melting moments. Baking them at home can be a joyful activity, one that brings families together. Sharing them, whether in a lunchbox or at a birthday party, creates lasting memories.
A Perfect Balance of Flavour and Texture
Melting moments may look humble, but don’t be fooled by their simplicity. It’s that very simplicity that makes them so superior. The deep, creamy richness of butter is beautifully balanced by the delicate sweetness, creating a harmonious flavour. Meanwhile, the crisp exterior contrasts with the soft, melt-in-your-mouth interior, delivering that trademark texture.
It’s this perfect harmony of texture and flavour that keeps people coming back for more. Whether you’re enjoying a quick coffee break or treating yourself during teatime, melting moments always deliver.
Tips for Making the Perfect Melting Moments
Feel inspired to try your hand at baking these irresistible biscuits? Here are some key tips to ensure success in your baking adventures:
Common Mistakes to Avoid
Don’t overmix the dough…
Gentle mixing keeps the dough light and ensures a tender biscuit.
…or bake for too long!
These biscuits are delicate. Keep an eye on them in the oven to avoid over-browning.
Key Techniques for Success
Measure accurately
Precise measurements are crucial for that perfect crumbly texture.
Chill the dough
Before baking, chill the dough for 15–20 minutes to help the biscuits hold their shape.
Decorative touch
Use a fork to create ridges on the surface before baking. It’s the classic melting moment look!
For those who’d rather enjoy these biscuits without the effort of baking, you’re in luck! Explore our delicious range of cream biscuits and melting moments, popular in Australian cafes and homes alike.
From passionfruit to classic jam, there’s something for everyone.
This passionfruit cream biscuit is the quintessential Australian biscuit.
Try these handmade jam sandwich melting moments for a truly classic treat.
For true simplicity, this vanilla melting moment hits the mark every time.
Why Melting Moments Stand the Test of Time
Melting moments are more than just biscuits. They’re a little piece of joy wrapped up in simplicity and nostalgia. From their unique melt-in-your-mouth texture to the heartfelt memories they evoke, they have a timeless appeal.
Whether you bake them at home or indulge in a premium store-bought treat, they’re the kind of biscuit that feels like a warm hug on a quiet afternoon. Why not treat yourself to some today?
Browse our full range of handmade Australian biscuits and discover your new favourite.
Because in Australia, life’s best moments should always come with biscuits.
This article was reproduced on this site with permission from operafoods.com.au the “Australian Biscuits Wholesaler”.
See original article:- The Allure of Melting Moments: What Makes Them So Irresistible?
High Tea at Home Ideas for Every Occasion

Who doesn’t love a good high tea? There’s something universally pleasing about sipping tea and savouring delicate bites while enjoying a meaningful chat with friends or family. While high tea is often associated with grand hotels or quaint tea rooms, you can easily recreate the experience at home.
Whether you’re celebrating a special occasion, planning an intimate gathering, or simply indulging in some downtime, we’ve got creative high tea ideas to suit every event. Get cosy, pour yourself a cuppa, and discover how to make high tea at home a memorable experience for all.
High Tea vs Afternoon Tea – What’s the Difference?
But first, let’s answer an important question you might have wondered about. Is high tea the same as afternoon tea?
Not exactly! While both involve tea and bites, their origins and styles differ.
Afternoon Tea is a quintessentially British tradition, created in the 19th century for the upper class. Served in the mid-afternoon, it features dainty finger sandwiches, scones, cakes, and light teas. Think elegance and sophistication.
High Tea, on the other hand, originated with the working class and was served as a hearty evening meal after work. It included more substantial foods like meat pies, stews, and bread—both filling and practical.
Nowadays, “high tea” is simply used to describe tea parties, particularly outside the UK.
So, whatever you choose to call your tea party, here are some ideas to get you started.
Classic Afternoon Tea
When it comes to high tea at home, you can’t go wrong with tradition. A classic afternoon tea is simple yet elegant.
What to Serve
A classic afternoon tea typically features a selection of dainty sandwiches, scones with clotted cream and jam, and an assortment of sweet pastries.
Finger Sandwiches
Think cucumber and cream cheese, smoked salmon with dill, or egg and cress. Cut into small, crustless rectangles for a polished look.
Scones with Clotted Cream and Jam
Always a star of the show. Serve warm with indulgent clotted cream and your favourite fruit preserves.
Black Teas
Offer classic favourites like Earl Grey, English Breakfast, or Darjeeling.
Setting the Scene
Keep it chic with dainty china, linen napkins, and soft background music for a sophisticated touch.
Garden Party High Tea
Dreaming of something whimsical? Turn your outdoor space into a fairytale setting with a garden-themed high tea. Perfect for spring or summer entertaining.
What to Serve
Think of summer colours and fruity or floral flavours.
Floral-Inspired Treats
Delight guests with rose petal cupcakes, lavender shortbread, or elderflower tarts. These passionfruit creams are always a winner.
Seasonal Fruit
Add vibrant fruit platters or skewers for a fresh and juicy touch.
Herbal Teas
Chamomile, rosehip, and hibiscus teas pair beautifully with light garden fare.
Setting the Scene
Decorate your table with fresh blooms, pastel-hued tableware, and vintage teapots for that enchanted garden feel.
Celebration High Tea
Celebrate life’s big and small moments with a high tea that’s all about indulgence. This works wonderfully for birthdays, anniversaries, or just because! Elegant, delicious, and perhaps a tad bubbly!
What to Serve
From savoury bites to sweet treats, a celebration high tea is all about offering a variety of indulgent and beautifully presented dishes.
Luxurious Treats
Impress guests with rich chocolate truffles, colourful macarons, and mini quiches.
Prosecco or Champagne
Add a bubbly toast to elevate the occasion. For a non-alcoholic option, try sparkling elderflower or apple spritzers.
Specialty Teas
Opt for something more decadent, like a spiced chai or a fragrant jasmine blend.
Setting the Scene
Fancy glasses and celebratory place settings are a must.
Themed High Tea
Why not inject some fun and creativity into your tea gathering by choosing a theme? Aligning your menu and décor with a cultural or pop-culture idea ensures your party is truly unforgettable.
Ideas to Try
Alice in Wonderland Mad Hatter Theme
Serve themed treats like “Drink Me” potions (mocktails), mismatched teacups, and brightly coloured sweets.
Holiday Tea
Spice things up for Christmas with gingerbread biscuits, fruit mince pies, and spiced teas like cinnamon or clove blends.
Global Tea Journey
Explore teas and snacks from around the world. Serve Turkish delight with mint tea or dim sum with oolong tea for an exotic twist.
Setting the Scene
Encourage your guests to add to the atmosphere with themed outfits or accessories!
Healthy High Tea
For your health-conscious friends, a lighter version of high tea can still be both delicious and Instagram-worthy.
What to Serve
Think fresh salads and dips, gluten-free options, and green tea to keep things light and nutritious.
Wholesome Snacks
Fresh fruit skewers, veggie sticks with hummus, and gluten-free scones.
Low-Sugar Desserts
Consider raw vegan bites, chia puddings, or lightly sweetened muffins featuring natural ingredients.
Green Teas and Infused Water
Keep the beverages on the lighter side with green tea, kombucha, or matcha lattes.
Setting the Scene
Beautiful platters and natural-themed tableware (like wooden boards for serving) will enhance the fresh and wholesome vibe.
Kid-Friendly High Tea
Hosting a party for the little ones? Turn your high tea into an exciting adventure that’s as fun for the kids as it is for you!
What to Serve
Think colourful, playful, and bite-sized treats that are both delightful and easy for little (and big) hands to enjoy!
Bite-Sized Treats
Make PB&J sandwiches, and mini cupcakes, and serve kid-friendly biscuits such as these handmade freckle bickies.
Fun Drinks
Fruity iced teas, pink lemonade, or warm hot chocolate with marshmallows.
Interactive Stations
Kids can decorate their own cookies or build their own sandwiches.
Setting the Scene
Bright, themed décor and activities like storytelling or colouring will keep the little ones happily engaged.
Cozy Winter High Tea
When the weather turns chilly, there’s nothing quite like warming up with a hearty cup of tea and comfort snacks with friends.
What to Serve
Savoury Pies
Mini pot pies, sausage rolls, or spinach and feta pastries offer a hearty twist.
Spiced Sweets
Gingerbread, cinnamon cookies, and sticky toffee pudding are perfect winter treats. These ginger and date biscuits hit the right note.
Hot Beverages
Chai tea, mulled cider, or even a decadent hot chocolate will keep everyone cosy.
Setting the Scene
Plaid tablecloths, candles, and soft blankets will enhance the wintery atmosphere.
DIY High Tea
For a fun and interactive twist, create a do-it-yourself high tea experience.
How It Works
Scone Bar
Provide plain scones with a variety of spreads (jam, lemon curd, and honey) and toppings (berries, nuts, whipped cream).
Custom Tea Blends
Create a tea station with loose-leaf teas and optional add-ins like dried fruits, herbs, and spices.
Decorate Together
Offer simple biscuits, such as these shortbread cookies, that guests can decorate with icing, sprinkles, and toppings.
Setting the Scene
Use elegant tablecloths, tiered stands, and fresh flowers to create an inviting atmosphere for your DIY high tea.
Elevate Your High Tea with Opera Foods
High tea isn’t complete without proper biscuits, and we have got you covered with our wide range of handmade Australian biscuits and cookies. From indulgent cream-filled cookies to kid-friendly bickies, our Bush Cookie brand offers something for every gathering.
Here’s to High Tea at Home!
Ultimately, creating high tea at home is about crafting an experience that’s personal, inviting, and just a little indulgent. Whether you go traditional, thematic, or totally DIY, there’s no wrong way to enjoy a tea party.
Feeling inspired? Gather your teapots, prep your favourite snacks, and start planning your next tea party. Just don’t forget the biscuits!
This article was reproduced on this site with permission from operafoods.com.au the “Australian Biscuit and Cookie Suppliers”.
See original article:- High Tea at Home Ideas for Every Occasion
Make Christmas Chocolate Salami Your Next Holiday Hit

When you think of classic Christmas treats, chances are cookies, fruitcakes, and gingerbread come to mind. But if you want to surprise your holiday guests with something unique and utterly delicious, it’s time to bring chocolate salami into the spotlight. Don’t worry—it doesn’t involve actual meat! This European-inspired dessert combines rich, chocolatey flavour with crunchy textures, all rolled up to resemble a traditional salami. Intrigued? Keep reading to learn how to make this no-bake treat the centrepiece of your holiday celebrations.
What Is Chocolate Salami?
Don’t be fooled by the name—chocolate salami is entirely sweet. Originating in Europe and especially popular in Italy and Portugal, this dessert is a mix of chocolate, crushed biscuits, nuts, and sometimes dried fruits. The mixture is shaped into a log, chilled, and sliced to resemble the look of cured salami. It’s festive, fun, and far easier to make than you might think. Plus, it adds a touch of old-world charm to your holiday spread.
Perfect for gifting or serving at your next Christmas party, chocolate salami is the kind of treat that will have everyone asking for the recipe. The best part? There’s no need to turn on the oven!
How to Make Christmas Chocolate Salami
Here we use milk to keep the mixture soft and have added a festive touch with flavours of orange and the sharpness of cranberries.
Ingredients
Here’s what you’ll need (makes 1-2 logs, depending on size).
200g dark chocolate
100g unsalted butter, soft
2 tbsp golden syrup
2 tablespoons cocoa powder
75ml milk
2 tbsp Grand Marnier
200g choc chip cookies
50g almonds
50g mixed peel
zest of one orange
Icing sugar, for dusting
Instructions
1. Prepare Your Ingredients
Break the biscuits into small chunks, but don’t crush them completely—you want bite-sized pieces for a nice crunch.
If you’re using nuts, chop them roughly. Roast them briefly for extra flavour, if desired.
2. Melt the Chocolate
Use a heatproof bowl over a pot of simmering water to melt the dark chocolate. Stir occasionally until smooth and glossy. You can use the microwave but you need to work in short bursts and make sure it doesn’t burn.
3. Mix It All Together
Stir in the softened butter, syrup, cocoa powder, milk and liqueur until well combined.
Add the biscuits, nuts, dried fruit and orange zest. Mix gently to ensure everything is evenly coated in the chocolate mixture.
4. Shape the Salami
Lay out a large piece of plastic wrap or parchment paper. Spoon the mixture onto the wrap and shape it into a log.
Roll it up tightly, twisting the ends of the wrap like a candy wrapper to hold its shape.
5. Chill Until Firm
Place the log in the refrigerator for at least 3-4 hours, or until it’s completely firm. If you’re in a hurry, the freezer can speed things up.
6. Final Touches
Once firm, remove the wrap and dust the log with icing sugar to complete the “salami” effect. Slice into rounds and serve!
So there you have it. A quick and easy festive treat. Why not make a batch (or two) and share it with your loved ones this Christmas? Maybe even start a new tradition?
Don’t forget to check out our selection of Australian biscuits and cookies.
This article was reproduced on this site with permission from operafoods.com.au the “Australian Biscuits Wholesaler”.
See original article:- Make Christmas Chocolate Salami Your Next Holiday Hit
Top 5 Guilt-Free Dips for Your Favourite Crackers.

Finding the perfect dip to accompany your favourite crackers can transform a simple snack into a moreish treat. However, with health and wellness being more front-of-mind than ever, the challenge lies in choosing options that are both delicious and nutritious. Many traditional dips are laden with unhealthy fats and calories, but fear not—there are plenty of guilt-free alternatives that don’t skimp on flavour.
In this guide, we’ll explore five tasty and healthy dips that you can enjoy without a second thought, making your snacking both satisfying and sensible. Whether you’re hosting a party, looking for a fun appetizer, or just want a better option for your afternoon snack, these dips offer a perfect match for your crispy, crunchy favourites.
Dip #1: Creamy Avocado Salsa
Guacamole is fairly healthy as it goes but, depending on your health goals, you may want to make a version without the oil.
Ingredients
- 2 ripe avocados, peeled and pitted
- 1 cup fresh coriander leaves, chopped
- 1/2 cup diced red onion
- 1 large tomato, diced
- 1 jalapeño pepper, seeded and finely chopped
- 2 tablespoons fresh lime juice
- Salt and pepper to taste
Preparation
- Mash the Avocados. In a medium bowl, mash the avocados with a fork until creamy but still slightly chunky.
- Mix in the Vegetables. Add the chopped cilantro, diced red onion, and tomato to the mashed avocado, stirring gently to combine.
- Add Spice and Citrus. Stir in the diced jalapeño and fresh lime juice, mixing until all ingredients are fully incorporated.
- Season. Sprinkle with salt and pepper to taste, adjusting the seasoning as you prefer.
This refreshing dip not only bursts with flavour but is also packed with nutrients. Avocados provide heart-healthy monounsaturated fats, while cilantro and lime juice add a zesty freshness, making this salsa a guilt-free addition to any snack table.
Dip #2: Greek Yogurt and Dill Spread
You may associate dill with Scandi flavours, yet did you know that this misunderstood herb is also a key flavour in Greek cuisine?
Ingredients
- 1 cup Greek yogurt
- 1/4 cup fresh dill, finely chopped
- 1 clove garlic, minced
- 1 tablespoon lemon juice
- 1 teaspoon olive oil
- Salt and pepper to taste
Preparation
- Combine Ingredients. In a medium mixing bowl, combine the Greek yogurt, chopped dill, and minced garlic.
- Add Citrusy Notes. Stir in the lemon juice and olive oil, blending well until the mixture is smooth and creamy.
- Season. Add salt and pepper to taste, adjusting according to your preference.
This Greek Yogurt and Dill Spread is not only rich in probiotics, thanks to the yogurt, but also delivers a burst of fresh flavours with the aromatic dill and tangy lemon.
Dip #3: Roasted Red Pepper Hummus
The humble hummus is elevated with the sweetness of roasted red peppers. You could use peppers from the deli counter, but they will be softer and sweeter if you roast them yourself.
Again, it depends on your definition of healthy but we have cut down the amount of olive oil to lower the calorie count. If you want to reduce it further you could use less tahini too.
Ingredients
- 1 can (15 oz) chickpeas, drained and rinsed
- 2 large red bell peppers
- 1/4 cup tahini
- 2 tablespoons lemon juice
- 1 cloves garlic, minced
- 1 teaspoon ground cumin
- 1/4 teaspoon smoked paprika
- 2 tablespoons olive oil
- Salt and pepper to taste
Preparation
- Roast the Peppers. Preheat your oven to 450°F (230°C). Place the red bell peppers on a baking sheet and roast for about 20-25 minutes, turning occasionally, until the skin is charred. Transfer them to a bowl and cover with plastic wrap to steam, which makes peeling easier. Once the peppers are cool, peel away the skins, remove the seeds, and chop the flesh.
- Blend the Hummus. In a food processor, combine the chickpeas, chopped roasted peppers, tahini, lemon juice, minced garlic, ground cumin, and smoked paprika. Blend until smooth.
- Add Olive Oil. With the processor running, slowly drizzle in the olive oil until fully incorporated and the hummus is creamy. If needed, add a little water or more olive oil to reach your desired consistency.
- Season. Taste and adjust the seasoning with salt and pepper.
This Roasted Red Pepper Hummus is not only vibrant in colour but also brimming with flavour and nutrients. Chickpeas offer fibre and protein, while red peppers add a sweet, smoky depth.
Chickpeas are a fantastic source of plant-based protein, making them an excellent choice for vegetarians and vegans. They provide about 15 grams of protein per cooked cup, which supports muscle building and repair. Besides protein, chickpeas are packed with essential nutrients such as iron, zinc, and B vitamins, complementing a well-rounded diet. Plus, their rich fibre content aids digestion and contributes to a feeling of fullness, helping with weight management.
Adding roasted red peppers to your hummus doesn’t just enhance its flavour, but it also significantly boosts its nutritional profile. These bright, colourful vegetables are rich in vitamins A and C, which are crucial for maintaining healthy skin and boosting the immune system. Red peppers are also high in antioxidants such as beta-carotene and lycopene, which are known for supporting overall health and reducing the risk of chronic diseases.
Dip #4: Spicy Black Bean Dip
Similar to hummus, yet with a completely different flavour profile, this spicy black bean dip is perfect for those who enjoy a little kick in their dips.
Ingredients
- 2 cups cooked black beans (or one 15-ounce can, drained and rinsed)
- 1 jalapeño pepper, seeded and diced
- 2 cloves garlic, minced
- 1 lime, juiced
- 1 teaspoon ground cumin
- 1/2 teaspoon smoked paprika
- Salt and pepper to taste
- 1/4 cup fresh cilantro leaves
- 2 tablespoons olive oil
- 1/4 cup water (or as needed for consistency)
Instructions
- Blend Ingredients. In a food processor, combine the black beans, jalapeño, garlic, lime juice, cumin, smoked paprika, salt, and pepper. Pulse until the mixture is somewhat smooth.
- Incorporate Cilantro and Olive Oil. Add the cilantro leaves and olive oil to the processor. Blend until the cilantro is well chopped and the mixture is smooth.
- Adjust Consistency. With the processor running, add water a little at a time to reach the desired consistency. The dip should be smooth and spreadable.
- Final Seasoning. Taste and adjust the seasoning with more salt, pepper, or lime juice as needed.
This Spicy Black Bean Dip is a nutritious and flavourful choice. Served with crackers it makes a filling and satisfying snack. Black beans are fibre-rich and high in protein, making this dip both hearty and healthy. Plus, the jalapeño peppers add a kick while also providing a good dose of vitamins A and C.
Black beans offer a range of health benefits that make them a staple in many diets. They are an excellent source of plant-based protein and dietary fibre, which contribute significantly to digestive health and help maintain steady blood sugar levels. Additionally, black beans are packed with essential vitamins and minerals, including folate, magnesium, and potassium, which support heart health and reduce the risk of cardiovascular diseases. Their antioxidant content also plays a crucial role in protecting cells from damage, reducing inflammation, and combating free radicals.
Dip #5: Classic Tomato and Basil Pesto
You may not think of pesto as a dip, but served alongside crackers it can be surprisingly moreish. This is more calorie-dense than our previous suggestions, but a little goes a very long way. Literally a dip, rather than a scoop.
Ingredients
- 2 cups fresh basil leaves
- 1 cup cherry tomatoes, halved
- 1/4 cup pine nuts or walnuts
- 1 cloves garlic, minced
- 1/4 cup grated Parmesan cheese
- 1/3 cup extra-virgin olive oil
- Salt and pepper, to taste
- Zest of 1 small lemon
Instructions
- Prepare the Ingredients. Start by washing and drying the basil leaves and cherry tomatoes. Set them aside.
- Toast the Nuts. In a small skillet over medium heat, toast the pine nuts or walnuts, stirring frequently, until they are golden brown. Be careful not to burn them. Remove from heat and let them cool slightly.
- Blend the Base. In a food processor, combine the basil leaves, cherry tomatoes, toasted nuts, and minced garlic. Pulse until the mixture is finely chopped.
- Add Cheese and Olive Oil. Add the Parmesan cheese to the processor. While pulsing, slowly drizzle in the olive oil until the mixture is smooth and creamy. You can adjust the amount of olive oil based on your desired consistency.
- Season and Add Lemon. Add salt, pepper, and lemon zest to the mixture. Pulse briefly to combine and then taste, adjusting the seasoning if necessary.
Fresh basil and cherry tomatoes are both rich in vitamins A and C, which support immune function and skin health. The nuts, whether you choose pine nuts or walnuts, provide healthy fats and essential minerals like magnesium and zinc. Garlic adds an antioxidant boost, while Parmesan offers calcium for strong bones.
Olive oil is a source of monounsaturated fats, known for their heart-healthy benefits and a valuable ingredient in any healthy kitchen. Don’t be afraid to use it liberally unless you are calorie-conscious.
Choosing healthy dips to go with your crackers brings a multitude of benefits to the table. Not only do these dips add vibrant flavours to your meal, but they also pack a nutritious punch. The fresh ingredients ensure you’re getting vital vitamins and minerals that support overall health. Incorporating such healthy dips into your diet is an easy and delicious way to enhance both the taste and nutritional value of your meals.
Of course, you are going to want some crackers to go with all these dips. Have you tried our Lavosh crackers which are handmade in Australia?
This article was reproduced on this site with permission from operafoods.com.au the “Australian Biscuits Supplier”.
See original article:- Top 5 Guilt-Free Dips for Your Favourite Crackers
S’mores – Not Just For Outdoors

Many people associate s’mores with campfires and summer nights. Combining the crispy texture of cookies, the gooey goodness of toasted marshmallows, and the rich taste of chocolate, their popularity spans generations, evoking fond memories of gatherings with friends and family around a crackling fire.
Which is great. We cannot deny that the beauty of s’mores lies in that smoky campfire flavour and the memories they bring. But the flavour combo is so good, why save it for outdoors?
So, we say. Bring on the s’mores.
Why are s’mores called s’mores?
The name “s’mores” is a contraction of the phrase “some more,” which reflects the irresistible nature of these treats. Once someone has had a s’more, they often find themselves asking for “some more” because they’re simply too delicious to resist!
The origins of s’mores date back to at least the 1920s, with the earliest known recipe appearing in a U.S Girl Scouts publication. Since then, s’mores have become a staple of outdoor fun, symbolizing summer nights filled with laughter and tasty treats.
The Classic S’mores Recipe
Some would say it’s not a s’more without the smoke. So just in case you are new to this, here’s how you do it.
How to make s’mores at the campfire?
- Gather Your Ingredients: You’ll need biscuits, marshmallows, and chocolate bars. It’s also a good idea to have some roasting sticks handy for toasting your marshmallows.
- Build Your Fire: Start a campfire and let it burn down until you have a nice bed of glowing embers. This ensures an even heat for roasting your marshmallows.
- Toast the Marshmallows: Skewer a marshmallow on the end of your roasting stick and hold it over the fire. Rotate it slowly to ensure that it toasts evenly. Keep an eye on it and remove it when it’s golden brown and gooey, or darker if you prefer a more caramelized finish.
- Assemble the S’more: Take a biscuit and place a square of chocolate on it. Once your marshmallow is perfectly toasted, carefully place it on top of the chocolate. Finally, top it with another biscuit and gently press down to squish everything together.
- Let the chocolate melt: Allow the heat from the marshmallow to melt the chocolate a bit, then take a big bite.
How to make s’mores on a charcoal grill?
Making s’mores on a charcoal grill is a fantastic alternative when campfires aren’t an option. It’s simple and brings that same delicious gooeyness everyone loves.
There are two ways you could go about this. Either way, you want to start with your fire.
Start by lighting your charcoal grill and letting the coals burn until they’re covered with white ash. This indicates they’re ready for cooking and provides an even heat. Most likely, you will have cooked and eaten your meal, and are using the embers.
Similar to the campfire method, gather your biscuits, chocolate, and marshmallows.
Here, you can proceed pretty much as you would with a campfire, removing the grill grate and toasting skewered marshmallows in the embers.
Or you can assemble the s’mores as sandwiches and place them directly on the grill, or wrap them in foil and place them in the embers.
Creative Variations on Classic S’mores
A classic is a classic for a reason, and it is fairly hard to improve upon perfection. Then again, why not switch it up?
For a start, the classic American graham cracker is well, American. So you are going to want an alternative biscuit.
What biscuits to use for s’mores in Australia?
In Australia, while the classic s’mores use graham crackers, you can easily adapt the recipe using locally available biscuits. The obvious substitute is a Digestive biscuit.
Other popular commercial options include Arnott’s Marie biscuits, which provide a nice, subtle sweetness and a perfect crunch. Another favourite is the Malt-O-Milk biscuits, offering a unique flavour that pairs wonderfully with marshmallows and chocolate.
But why stop there? Why should Australian s’mores not be made with Anzac biscuits? Or chocolate chip cookies?
These macadamia biscuits could work really well.
Fun Variations on the Classic S’more
Swap out the chocolate for a layer of Nutella, and add crushed nuts for an extra crunch. Maybe include slices of fresh strawberries or bananas between the marshmallow and chocolate for a fruity twist. Or add a sprinkle of cinnamon or chili powder to the chocolate for a surprising, spicy element. There are many ways you could switch up a simple s’more.
S’mores For Different Seasons
Perhaps you want that whole gooey chocolatey biscuity marshmallowy thing now? Like indoors.
How to bake s’mores in the oven
Baking s’mores in the oven is a fantastic way to enjoy this beloved treat, especially when a campfire isn’t readily available. Here’s how you can create that classic s’mores experience right in your kitchen:
- Preheat Your Oven: Start by preheating your oven to 350°F (175°C).
- Prepare Your Baking Sheet: Line a baking sheet with parchment paper for easy cleanup. This will also prevent your s’mores from sticking.
- Layer the Ingredients: Arrange a layer of biscuits on the baking sheet. Place a piece of chocolate on top of each, followed by a generous amount of marshmallows. For an extra gooey experience, you can cut the marshmallows in half and lay them cut-side down over the chocolate.
- Bake: Pop the baking sheet in the oven and let it bake for about 5-7 minutes, or until the marshmallows are golden brown and the chocolate is melted. Keep an eye on them, as they can go from perfectly toasted to burnt quite quickly!
- Top and Serve: Once out of the oven, place another biscuit on top of each s’more to create a sandwich. Allow them to cool slightly before taking a bite.
Baking s’mores in the oven not only makes them accessible year-round but also allows you to whip up a larger batch to share with family and friends. Enjoy the warm, gooey goodness without ever leaving your home!
Explore our full range of Australian biscuits for more s’mores inspo!
This article was reproduced on this site with permission from operafoods.com.au the “Australian Biscuit Suppliers”.
See original article:- S’mores – Not Just For Outdoors
Biscuit Base For Cheesecake And Beyond

If there is one thing we love more than biscuits, it is a biscuit base. Because what’s not to love above biscuits plus butter? Most well-known as a cheesecake base, the uses for this simple mix of biscuit crumb with melted butter go far beyond just cheesecake. In this article, we take a closer look at how to get the most from your biscuit base.
What Is A Biscuit Base?
A biscuit base is a mixture of finely crushed biscuits combined with melted butter to make a simple crust for various desserts. Typically used for cheesecakes and tarts, the biscuit base provides a crunchy, flavorful contrast to creamy fillings. The recipe is hugely adaptable, creating a range of different tastes and textures.
Classic uses for a biscuit base
Some desserts naturally spring to mind at the mere mention of a biscuit base.
Cheesecake: One of the most popular desserts featuring a biscuit base, offering a crunchy foundation to the creamy, rich cheese mixture on top.
Banoffee Pie: Known for its sweet banana and caramel layers, this dessert uses a biscuit base for added texture and flavour.
Key Lime Pie: The biscuit base complements the refreshing lime filling, delivering a hint of sweetness to balance the tartness.
Then there are others that although classically made with pastry, are natural contenders for a biscuit base.
Chocolate Tart: A classic choice where the biscuit base supports a luscious, silky chocolate ganache.
Lemon Tart: The crisp biscuit base perfectly contrasts the tangy lemon filling.
How To Make Cheesecake Base
Nothing could be simpler than making a biscuit base for cheesecake, but there are several ways in which it could go wrong. Learning how to adapt the recipe will give you full control over not just the taste but that all-important texture.
The main ingredients for a biscuit base are biscuits and butter. That much is fairly obvious. But which biscuits are best, and for that matter, which butter?
Butter is pretty straightforward. You have salted, and you have unsalted. Which one you use depends on how salty your biscuits are, and how salty you want the base to be. Sometimes, you may want to keep that saltiness to a minimum, yet at other times you may want to play around with it and bring it to the fore. Think peanut butter pie, for example.
As butter is a key ingredient, go for the best quality butter you can. There are even lots of different types of butter ranging from the pale and creamy continental types to the more robust yellow varieties. Plain old supermarket butter will make a great cheesecake base, but why not play around and see what you can achieve by simply switching out your butter type?
And then there are biscuits. We do love a good biscuit, but which is better for our biscuit base?
Best Biscuits To Use For Cheesecake Base
When it comes to selecting the best biscuits for a cheesecake base, the key is to find ones that complement the flavour of your filling while providing the right texture. Digestive biscuits may be the classic choice due to their slight sweetness and crumbly texture, and there are times when you just don’t mess with the classics, but surely we can do better than that.
You can use any biscuits for a cheesecake base as long as they are crispy/crumbly rather than soft/chewy. It needs to be dry enough to break down easily into crumbs, and then absorb (or at least be coated with) the butter. Different biscuits vary in how much butter they absorb, so you might need to adjust your proportions to get the right consistency for your base.
A food processor is a handy tool, especially when working with chocolate-coated or cream-filled biscuits, as it helps achieve a uniform crumb. Cream-filled biscuits can lead to a softer, sweeter crumb, making them an exciting choice to experiment with. Chocolate-coated biscuits add a chocolate flavour, but also a different textural element.
Why not try?
Our Anzac biscuits for a classic oaty Australian crunch.
Try these ginger and macadamia biscuits for a hint of spice.
What about a triple chocolate chip cookie for an extra chocolatey base?
These passionfruit creams could offer creative inspiration for a fruity dessert.
Gluten-free? That’s simple, go for a gluten-free biscuit. You might need to experiment as the gluten-free crumb may behave differently.
Ultimately, the best biscuits to use will align with the flavour profile you desire and will balance the texture and taste of the cheesecake/dessert as a whole.
Cheesecake Base Recipe
This will line the base of a 23cm round tin. If you want to press the mixture up the sides, make twice the recipe.
250g biscuits
125g butter, melted
- Blitz the biscuits in a food processor to a fine crumb. Or, put them in a plastic bag and bash them with a rolling pin. Whichever you choose, you want something that looks like damp sand.
- Tip the crumb into a bowl. Even if you used a food processor.
- Stir the butter into the crumb using a wooden spoon or spatula. You want something that just sticks together.
- Press the mixture gently into the tin and set in the fridge for half an hour before filling.
- You can pile the crumb loosely onto a baking tray and set it without pressing it to form a crumble.
Tips and tricks for the perfect biscuit base
- Choose the Right Biscuit: Select a biscuit that complements your filling. A sweeter biscuit like double chocolate works well with tangy fillings, while plain biscuits can balance rich, creamy textures.
- Get the Consistency Right: Aim for a crumb consistency similar to damp sand. Too coarse and it won’t hold together; too fine, and it might turn mushy.
- Avoid Over-Pressing: When pressing the crumb mixture into the tin, apply gentle pressure. Over-pressing can lead to a dense, hard base.
- Melt the Butter Properly: Ensure the butter isn’t too hot when mixing it with the crumb, as this can cause the crumbs to become greasy or soggy.
- Experiment with Flavours: For extra flavour, consider adding a pinch of cinnamon, nutmeg, or even a splash of vanilla extract to the crumb mixture.
- Chill for Firmness: Allowing the base to chill for at least 30 minutes helps it firm up, ensuring it’s sturdy enough to support the filling.
- Test Different Ratios: Depending on the thickness you prefer, you might need more or fewer biscuits. Experiment with proportions to find your perfect balance.
- Use Parchment Paper: Lining the tin with parchment paper can help easily lift out the base without breaking it.
Frequently Asked Questions
Common issues and how to solve them, like a crumbly or overly firm base.
Why is my cheesecake biscuit base so hard?
A hard cheesecake biscuit base is often the result of pressing the crumb mixture too firmly into the tin. While it’s important to compact the crumbs so they hold together, over-pressing can lead to a dense and difficult-to-cut base.
Additionally, using too much butter can create a harder texture. To fix this, apply light pressure when spreading the mixture into your tin and ensure you’re using the right amount of butter, just enough to bind the crumbs together.
Finally, make sure the crumbs are not too finely processed, as this can also contribute to an overly firm base. Adjusting these factors should help you achieve a lighter, more manageable base.
Why is my cheesecake biscuit base too crumbly?
The opposite end of the spectrum is a base that is too crumbly.
A crumbly cheesecake biscuit base is typically due to not using enough butter or not compressing the mixture sufficiently.
Butter acts as the binding agent, so if the crumbs aren’t holding together, it’s likely that there’s not enough of it. Make sure you’re using the correct ratio of butter to biscuits; if necessary, slightly increase the butter until the mixture holds together when pressed.
Additionally, ensure you’re pressing the mixture evenly and firmly into the tin. Were your crumbs too coarse, or too fine? Getting the balance right is essential; damp sand, remember? Correcting these steps should help create a base that stays intact without falling apart.
Can I make a vegan biscuit base?
Absolutely, you can make a vegan biscuit base! The key is to replace traditional butter with a plant-based alternative. Also, ensure that the biscuits you’re using are vegan-friendly—many store-bought options are already free from animal products, but it’s always good to double-check the label.
Vegan butter or margarine works wonderfully as a binding agent, much like its dairy counterpart. You do need to be mindful of water content in vegan butter alternatives, which may result in a softer and less crumbly base.
Coconut oil could be your best bet, as it melts but sets solid just like butter.
Just follow the same general guidelines: mix the vegan butter with your crushed biscuits to achieve a sand-like texture, press lightly into your tin, and voilà—you’ve got a delicious vegan base ready for your cheesecake.
Creative Ideas For Biscuit Base
Make it interesting
There are loads of things you can do to add interest to your base.
Add Nuts or Seeds
Incorporate crushed nuts or seeds like almonds, walnuts, or chia for an extra crunch and nutty flavour.
Mix in Spices
Add a pinch of cinnamon, nutmeg, or cardamom to your crushed biscuits for a warm, inviting aroma and taste. Vanilla powder is an excellent alternative to the usual paste or essence.
Citrus Zest
Blend in some lemon, lime, or orange zest with the biscuit crumbs to give your base a fresh and zesty kick.
Incorporate Cacao
For chocolate lovers, mixing in some cacao powder with your base can add richness and depth. Or even cacao nibs.
Go beyond cheesecake
Not just for cheesecake base or a classic banoffee pie, biscuit base is a really easy dessert solution and most people love it. Here are a few ideas to kickstart your creativity.
Mini Tarts
Use the biscuit base to create individual tart shells, and fill them with your favourite custard, fruit, or chocolate mousse.
Ice Cream Cups
Make mini cookie cups with the biscuit base, then add a scoop of ice cream for a delightful treat.
Caramel Slice
Layer the base with caramel and chocolate for a decadent no-bake treat.
Chocolate Bark Base
Spread melted chocolate over a pressed biscuit base, sprinkle with nuts or dried fruit, then break into pieces for a crunchy chocolate bark.
Peanut Butter Bars
Combine peanut butter with cream cheese and spread over a set biscuit base. Set in the fridge for an easy, no-bake treat.
Brownie Bottom Bars
Use the biscuit base as a crust, add your brownie batter on top, and bake for a crunchy twist on traditional brownies.
Lemon Bars
Pour a tangy lemon filling over the biscuit base and bake until set for a refreshing and citrusy bake.
Get creative with crumb
There are also many different ways you could play with the texture, beyond pressing it into a base. You could leave it to set as is, for a light yet crispy crumb. Or, you could press it into a tin, and then once set break it up into crunchy crispy chunks.
Individual cheesecakes
Pile into individual glasses and top with cheesecake mix or even mousse.
Layer into parfait
Layer with fruit and yoghurt for a decadent twist on a classic parfait.
Sprinkle over ice cream
Add some buttery biscuit texture to a simple bowl of ice cream.
Fruit Crumble
Sprinkle biscuit crumbs over baked fruit mixtures to add a buttery, crispy topping for an easy fruit crumble.
Trifle Layers
Replace traditional cake layers with biscuit base crumbs for a twist on classic trifle desserts.
A final word
So you see, a pack of biscuits and some butter can open up a world of creative possibilities in the kitchen. The versatile biscuit base serves as a foundation for countless desserts. You can experiment with textures by setting the base whole, pressing it for a crunchy layer, or crumbling it into crunchy toppings that elevate simple desserts into something special.
Whether you’re aiming for a quick snack or an impressive dish for a gathering, these ideas ensure your creations are always exciting and delicious. The next time you reach for biscuits, consider these options and let your imagination guide you to sweet perfection.
Don’t forget the biscuits! Check out our full range of traditional Australian baked biscuits for more inspo.
This article was reproduced on this site with permission from operafoods.com.au the “Packaged Cookie Suppliers”.
See original article:- Biscuit Base For Cheesecake And Beyond
The Best Biscuits for Coffee

We all know that there’s nothing quite like dunking a biscuit in a lovely cuppa. Of tea, that is. But what about the coffee lovers amongst us; surely we deserve a piece of that action too? There are two sides to enjoying coffee and biscuits, and they don’t always go together. On the one hand, there’s flavour. It’s gotta taste good, right? A well-earned coffee break is not something we take lightly. But then there’s dunking. How much do we need to dip that biscuit…
What Biscuit Goes Well With Coffee?
Coffee is an entirely different animal from tea, and what (as they say) is good for the goose is not always entirely good for the gander. Coffee pairings are not always easy, but one thing is for certain. You need a biscuit with a bit of character. Something that will stand up, look coffee straight in the eye and announce ‘Here I am’.
The Rich and Chocolatey
Coffee likes chocolate. And chocolate likes coffee. There’s just something there that cannot be denied. Dark chocolate is bold, and the two bring out the best in one another. The creamy sweetness of milk chocolate tames the wild intensity of coffee into something more comforting. Something mocha-esque.
A chocolate-coated biscuit is most definitely not made for dunking. But that does not mean it can’t be the perfect partner for a cup of coffee.
On the other hand, the classic chocolate chip cookie offers the perfect balance of chocolatey flavour with a slightly gooey texture that soaks up coffee like a sponge.
The Buttery and Flaky
Oh, the joy of a buttery biscuit! It’s like a hug for your taste buds, and when submerged into a warm Arabica blend, it soaks up all that robust coffee goodness. The classic shortbread biscuit, with its crumbly texture and rich flavour, is the partner your coffee has been pining for.
The Rough and Ready
Sometimes you want something just a little more robust. A rugged dunker full of flavour like a classic Anzac bikkie.
The Spicy and Aromatic
Spice up your coffee routine with something that packs a punch, like these ginger and date biscuits. Dip them into a latte, and the creaminess of the milk perfectly complements the zesty ginger bite.
Sweet and Creamy
Cream-filled biscuits sit somewhere in the middle. They also completely divide the crowd. Whilst they will stand up well to a decent dunking, would you really want to?
What Biscuits do you Dunk in Coffee?
Debatably, there’s an art to dunking. It’s all about the timing—the quick, strategic plunge into the coffee, allowing the biscuit to soak up just enough liquid while retaining its integrity. Nobody wants a biscuit graveyard at the bottom of their cup.
As any tea lover will tell you, just because a biscuit tastes really really good, this doesn’t necessarily make it dunkable. There is an art to successful dunking and, let’s face it, when you take taste out of the equation tea and coffee pretty much boil down to the same thing.
So, let’s explore the art of biscuit dunking.
Timing
Just like a perfect handshake, there’s the right amount of time for a dunk. Too short, and you miss out on the coffee infusion; too long, and you’re fishing for biscuit remnants at the bottom of your cup.
Choose your weapon
Not all biscuits are built for dunking. Go for something sturdy that won’t crumble at first contact with your brew.
Texture
A slight softening from the coffee can elevate the texture to a whole new level of deliciousness.
Flavour pairing
Think about the coffee’s undertones—nutty, fruity, chocolatey? Pick a biscuit that complements or contrasts these flavours.
Nail your technique
Dunk at an angle for even saturation and to prevent half the biscuit from soaking too much while the other half remains dry as the Sahara.
Make it your own
Because rules are made to be broken. Happen to like the biscuity sludge at the bottom of the cup? Go for it. Like the way a chocolate biscuit melts like a mocha? Have at it.
Remember, the most important rule in the art of dunking is to have fun and enjoy your coffee just the way you like it—biscuit and all!
Whether you are a coffee purist or a cookie monster, there’s a great big world of biscuits waiting to be explored. Your ideal coffee companion is out there.
To all the café owners listening in, knowing your customers’ preferred coffee-biscuit pairings can turn a good morning routine into a great one. Maybe it’s time to jazz up that display case next to the cash register!
Explore our range of handmade Australian biscuits and find your perfect pair.
This article was reproduced on this site with permission from operafoods.com.au the “Australian Buscuit Manufacturers”.
See original article:- The Best Biscuits for Coffee